Great portrait photography depends heavily on skin tones. When skin looks natural and balanced, even a simple composition can feel polished and professional. When skin shifts too far toward orange, green, red, or gray, the entire image can feel less convincing.
The right Portrait Lightroom Preset can provide a useful starting point by applying a consistent combination of color, tone, contrast, and other Lightroom adjustments. Instead of editing every image completely from scratch, you can start with a preset and then fine-tune exposure, white balance, skin tones, and other settings for the specific photograph.
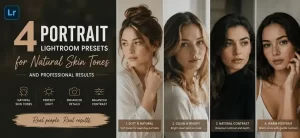
In this guide, we compare four portrait Lightroom preset collections with different strengths — from large versatile packs to street, luminous, and romantic portrait styles.
The goal isn’t to find one preset that works perfectly on every photograph. It’s to find a collection that fits your shooting style and gives you a useful starting point for consistent portrait editing.
- What Makes a Good Portrait Lightroom Preset?
- Natural Skin Tones
- Balanced Contrast
- Controlled Highlights
- Consistent Color
- Easy Fine-Tuning
- How to Choose a Portrait Lightroom Preset
- Quick Comparison: 4 Portrait Lightroom Presets
- 40 Portrait Lightroom Presets
- What’s Included
- Best For
- Why Consider This Collection?
- Pro Tip
- 10 Street Portrait Lightroom Presets
- What’s Included
- Best For
- Why Consider This Collection?
- Pro Tip
- 10 Shiny Portrait Lightroom Presets
- What’s Included
- Main Characteristics
- Best For
- Pro Tip
- Romantic Portrait Lightroom Presets
- What’s Included
- Best For
- Why Consider This Collection?
- Pro Tip
- How to Keep Skin Tones Natural with Lightroom Presets
- A simple portrait workflow
- How to Get Consistent Results Across a Portrait Session
- Recommended workflow
- Why Does a Portrait Preset Look Different on My Photo?
- Lighting
- Exposure
- White Balance
- RAW vs JPEG
- Camera Profile
- Skin Tones
- Do Portrait Lightroom Presets Work Better on RAW or JPEG?
- Which Portrait Lightroom Preset Should You Choose?
- Choose 40 Portrait Lightroom Presets if:
- Choose 10 Street Portrait Lightroom Presets if:
- Choose 10 Shiny Portrait Lightroom Presets if:
- Choose Romantic Portrait Lightroom Presets if:
- FAQ
- Are Lightroom presets good for portrait photography?
- Can Lightroom presets preserve natural skin tones?
- Can I use portrait presets on RAW photos?
- Can I use portrait presets on JPEG photos?
- Will one portrait preset work on every photo?
- Are mobile portrait presets different from desktop presets?
- How do I make a portrait preset look more natural?
- Can I use the same preset for an entire portrait gallery?
- Final Thoughts
What Makes a Good Portrait Lightroom Preset?
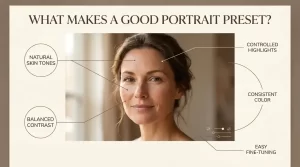
A good portrait preset should do more than simply make a photograph look warmer or more colorful.
When choosing a preset for portraits, look for several important characteristics:
Natural Skin Tones
Skin should remain believable after the preset is applied. A preset that creates attractive colors but pushes skin too far toward orange, red, or magenta may require more correction than it’s worth.
Balanced Contrast
Portraits generally benefit from controlled contrast. Deep shadows can add dimension, but excessive contrast can remove detail from hair, clothing, and darker areas of the face.
Controlled Highlights
Bright areas such as foreheads, cheeks, white clothing, and backgrounds can easily become distracting. A useful portrait preset should provide a good starting point without making highlights unnecessarily harsh.
Consistent Color
If you’re editing a portrait session rather than a single photograph, color consistency becomes especially important. Presets can help establish a common visual direction across multiple images.
Easy Fine-Tuning
No preset can account for every combination of camera, exposure, white balance, lighting, and subject. The best presets are therefore ones you can adjust easily after applying them.
In short: a portrait preset should make your editing process faster without taking away your control.
How to Choose a Portrait Lightroom Preset
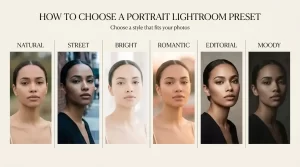
The best portrait preset depends largely on the type of photography you create.
| Portrait Style | Look to Consider | Best For |
|---|---|---|
| Natural | Clean color, moderate contrast | Everyday portraits, lifestyle |
| Street | Atmospheric contrast, urban tones | City portraits, documentary work |
| Bright & Luminous | Brighter tones, warm color | Summer portraits, lifestyle |
| Romantic | Soft warmth, gentle contrast | Couples, fashion, lifestyle |
| Editorial | Controlled contrast and refined color | Fashion and creative portraits |
| Moody | Deeper shadows and muted tones | Dramatic portraits |
It’s also worth checking the file formats and Lightroom compatibility before purchasing. Different preset collections may include different combinations of XMP, DNG, LRTEMPLATE, or other files.
If you are unsure which format you need, see our guide to DNG vs XMP Presets: Which One Should You Use?.
Quick Comparison: 4 Portrait Lightroom Presets
| Preset Collection | Best For | Main Style | Mobile | Desktop |
|---|---|---|---|---|
| 40 Portrait Lightroom Presets | Variety and different portrait styles | Natural, editorial, lifestyle | DNG | LRTEMPLATE / XMP |
| 10 Street Portrait Lightroom Presets | Urban and candid portraits | Atmospheric, urban | DNG | Desktop files |
| 10 Shiny Portrait Lightroom Presets | Bright lifestyle portraits | Warm, luminous | DNG | LRTEMPLATE |
| Romantic Portrait Lightroom Presets | Couples and lifestyle | Soft, warm, romantic | DNG | XMP |
Compatibility and included formats can change, so check the current product listing before purchasing.
40 Portrait Lightroom Presets
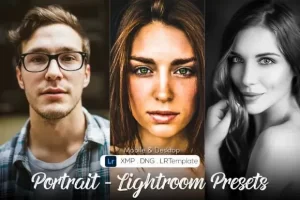
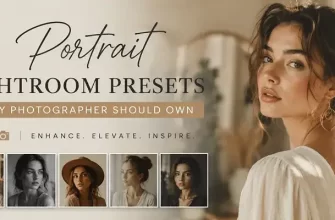
If you want a large collection with several different portrait editing directions, 40 Portrait Lightroom Presets is the most extensive option in this comparison.
The collection includes a broad selection of portrait-oriented presets, making it suitable for photographers and content creators who don’t want to be limited to a single visual style.
Instead of relying on one look for every session, you can experiment with different treatments and select a smaller group that fits your photography.
What’s Included
| Format | Included Files | Compatibility |
|---|---|---|
| LRTEMPLATE | 40 desktop presets | Check current product listing |
| XMP | 40 desktop presets | Check current product listing |
| DNG | 40 mobile presets | Lightroom Mobile |
| Installation guide | Setup instructions |
Best For
- Portrait photography
- Lifestyle photography
- Fashion and editorial portraits
- Couples
- Wedding portraits
- Social media content
Why Consider This Collection?
The main advantage is variety. Forty presets give you more starting points when your photography changes between indoor, outdoor, natural-light, and more editorial situations.
It’s particularly useful if you’re still discovering which portrait editing style fits your work.
Pro Tip
Don’t feel obligated to use dozens of presets regularly. Choose one representative portrait from a shoot and test several options. Once you find a few looks that work well with your camera and lighting, save those as your preferred starting points.
10 Street Portrait Lightroom Presets
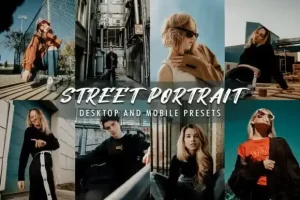
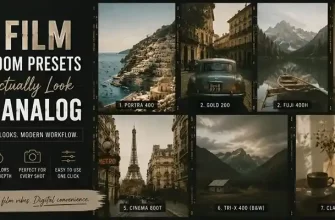
Street portraits often combine unpredictable lighting, urban backgrounds, mixed color temperatures, and candid moments. A preset designed specifically around this type of photography can therefore be useful when you want a consistent starting point without removing the character of the environment.
The 10 Street Portrait Lightroom Presets collection focuses on urban and candid portrait styles, making it particularly relevant for photographers working in city environments.
What’s Included
| Format | Included Files | Compatibility |
|---|---|---|
| DNG | 10 mobile presets | Lightroom Mobile |
| Desktop files | 10 presets | Check current product listing |
| Installation tutorials | Setup guidance |
Best For
- Street portraits
- Urban photography
- Candid portraits
- Documentary-style portraits
- Fashion photography in urban environments
- Lifestyle content
Why Consider This Collection?
The main strength here is specialization.
Rather than choosing a general portrait collection, you can use a street-focused pack when you want your portraits to retain some of the atmosphere of the surrounding city.
The look can be particularly useful for photographs featuring architecture, concrete, streets, evening light, or mixed urban colors.
Pro Tip
If a preset looks too bright or dark on your photograph, start by adjusting Exposure. Then check Shadows and Highlights before changing the color settings.
This lets you correct differences in lighting while preserving the overall color direction of the preset.
10 Shiny Portrait Lightroom Presets
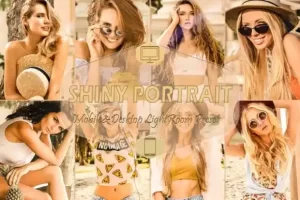
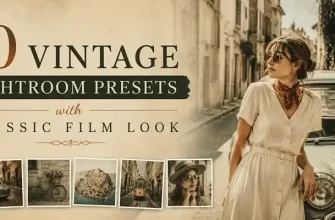
The 10 Shiny Portrait Lightroom Presets collection takes a brighter approach to portrait editing.
Its focus is on warm, luminous-looking portraits that can work particularly well with naturally bright or softly lit photographs.
This type of preset can be useful for summer portraits, lifestyle photography, outdoor sessions, and photographs made in soft window light.
What’s Included
| Format | Included Files | Compatibility |
|---|---|---|
| DNG | 10 mobile presets | Lightroom Mobile |
| LRTEMPLATE | 10 desktop presets | Check current product listing |
| Mobile installation guide | Setup guidance | |
| Desktop installation guide | Setup guidance |
Main Characteristics
| Focus | What to Look For |
|---|---|
| Brightness | A lighter overall tonal appearance |
| Warmth | Warm color treatment |
| Skin | Natural-looking luminosity |
| Detail | Defined facial and clothing detail |
| Overall mood | Bright, lifestyle-oriented portrait aesthetic |
Best For
- Summer portraits
- Lifestyle photography
- Outdoor portraits
- Soft window-light portraits
- Bright social media photography
Pro Tip
Start with a photograph that has reasonably balanced exposure and white balance. After applying the preset, adjust Exposure and Temperature if necessary.
Be careful with warmth on skin. A brighter portrait doesn’t necessarily need more orange or yellow. If skin starts looking too warm, reduce the warmth rather than trying to compensate with additional saturation.
Romantic Portrait Lightroom Presets
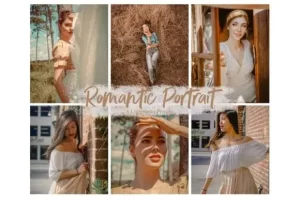
For photographers who prefer a softer and warmer visual direction, Romantic Portrait Lightroom Presets is the most style-specific collection in this comparison.
The presets are designed around a warm, gentle portrait aesthetic that can work well for couples, lifestyle sessions, fashion photography, and outdoor portraits.
What’s Included
| Format | Included Files | Compatibility |
|---|---|---|
| DNG | 6 mobile presets | Lightroom Mobile |
| XMP | 6 desktop presets | Lightroom desktop |
| Installation guide | Setup guidance |
Best For
- Couples photography
- Romantic portraits
- Lifestyle photography
- Fashion portraits
- Outdoor sessions
- Instagram portrait content
Why Consider This Collection?
The main difference is the soft romantic direction.
If your goal is a clean neutral portrait, another collection may be a better starting point. But if you consistently prefer warmer colors, softer contrast, and a more intimate mood, a specialized romantic collection can save time when establishing that style.
Pro Tip
This type of look usually works particularly well when the original photograph already has soft directional light — such as open shade, golden-hour light, or window light.
After applying the preset, check:
- Exposure
- White Balance
- Skin tones
- Shadows
- Highlight detail
Small adjustments are often enough to make a preset fit the photograph without losing its original character.
How to Keep Skin Tones Natural with Lightroom Presets
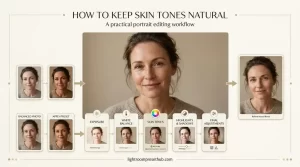
One of the biggest mistakes when using portrait presets is assuming that the preset should be left untouched.
Even a well-designed preset can look different depending on:
- camera model;
- exposure;
- white balance;
- natural or artificial light;
- time of day;
- background colors;
- RAW vs JPEG;
- camera profile;
- the subject’s skin tone.
A better workflow is to treat the preset as a starting point.
A simple portrait workflow
1. Start with a balanced photograph
Make sure the image isn’t severely overexposed or underexposed.
2. Apply the preset
Choose the closest visual style rather than automatically choosing the strongest effect.
3. Correct exposure
Adjust Exposure if the photograph is noticeably brighter or darker than the reference image.
4. Check white balance
Make sure skin doesn’t become excessively warm, cool, green, or magenta.
5. Inspect skin tones
Pay particular attention to the Orange and Red ranges in the Color Mixer/HSL controls.
6. Check highlights and shadows
Make sure facial detail, hair, clothing, and background elements remain visible.
7. Use masking when necessary
For difficult portraits, local adjustments can help balance the subject without changing the entire photograph.
The goal isn’t to make every portrait identical. The goal is to create a consistent visual style while keeping each photograph believable.
How to Get Consistent Results Across a Portrait Session
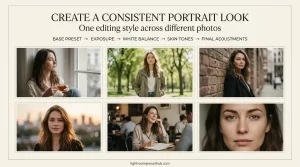
Using the same preset on every photograph isn’t necessarily the best way to create a consistent gallery.
A portrait session can contain very different lighting conditions:
- direct sunlight;
- open shade;
- indoor window light;
- studio lighting;
- golden hour;
- mixed artificial light.
Instead, use a consistent editing system.
Recommended workflow
Choose a base preset → correct exposure → adjust white balance → refine skin tones → adjust highlights/shadows → apply local corrections → review the entire gallery
This approach gives you much more consistency than simply applying the exact same settings to every image.
For example, two portraits from the same session might need different exposure adjustments even if they use the same preset.
Why Does a Portrait Preset Look Different on My Photo?
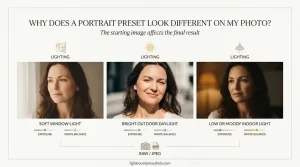
This is completely normal.
A preset contains saved editing adjustments, but it doesn’t know the exact lighting conditions or exposure of every photograph.
For example, a preset may look:
Warm and natural on a photograph taken during golden hour,
but
too orange on a photograph taken under warm indoor lighting.
Similarly, a preset that looks balanced on a correctly exposed RAW file may look too strong on an underexposed JPEG.
If your result doesn’t match the preview, check these factors first:
Lighting
Different light sources affect skin and background colors.
Exposure
A darker or brighter starting image can change how the preset feels.
White Balance
A preset cannot completely compensate for every incorrect white-balance situation.
RAW vs JPEG
RAW files generally provide more flexibility for correcting exposure and color.
Camera Profile
Different camera profiles can affect how Lightroom renders color.
Skin Tones
The same color adjustments can behave differently depending on the original skin tones and lighting.
This is why a preset should be treated as a starting point rather than a finished image.
Do Portrait Lightroom Presets Work Better on RAW or JPEG?
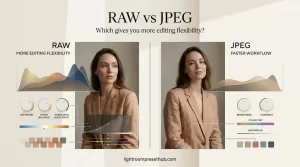
Portrait presets can be applied to both RAW and JPEG images, but RAW files generally give you more flexibility for fine-tuning the result.
With RAW photographs, you typically have more latitude when adjusting:
- exposure;
- highlights;
- shadows;
- white balance;
- color;
- tonal detail.
JPEG images can still work well with presets, especially for mobile photography and social media content, but aggressive adjustments may reveal limitations in the original file.
If you photograph portraits with a camera and have access to RAW files, RAW is generally the better starting point for a flexible Lightroom workflow.
Which Portrait Lightroom Preset Should You Choose?
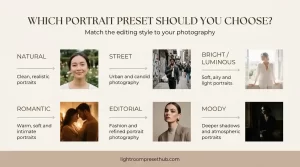
The four collections serve slightly different purposes.
Choose 40 Portrait Lightroom Presets if:
You want the largest selection of portrait looks and prefer having multiple starting points for different types of photography.
Choose 10 Street Portrait Lightroom Presets if:
Your photography focuses on cities, candid portraits, street photography, or urban fashion.
Choose 10 Shiny Portrait Lightroom Presets if:
You prefer bright, warm, luminous portraits and frequently work with outdoor or soft natural light.
Choose Romantic Portrait Lightroom Presets if:
You want a softer, warmer style for couples, lifestyle, fashion, and social media portraits.
The best choice isn’t necessarily the collection with the most presets. It’s the one whose editing direction is closest to your photography.
FAQ
Are Lightroom presets good for portrait photography?
Yes. Portrait presets can provide a useful starting point for color, contrast, tone, and other adjustments. However, exposure, white balance, and skin tones often need individual refinement.
Can Lightroom presets preserve natural skin tones?
They can help, but the result depends on the original photograph and the preset. Always check skin tones after applying a preset, particularly when lighting or white balance differs from the preset’s preview images.
Can I use portrait presets on RAW photos?
Yes. RAW files are particularly useful when you want to make additional exposure, white-balance, and color corrections after applying a preset.
Can I use portrait presets on JPEG photos?
Yes. Presets can be applied to JPEG images, although JPEG files generally provide less flexibility for major corrections than RAW files.
Will one portrait preset work on every photo?
Not perfectly. Differences in lighting, exposure, white balance, camera profiles, and backgrounds can significantly affect the final result.
Are mobile portrait presets different from desktop presets?
They can be distributed in different file formats, such as DNG for mobile and XMP or LRTEMPLATE for desktop workflows. Always check which formats are included with the specific collection.
How do I make a portrait preset look more natural?
Start by checking Exposure and White Balance. Then inspect skin tones, highlights, shadows, and saturation. Small adjustments are usually better than dramatically changing the preset.
Can I use the same preset for an entire portrait gallery?
You can use the same preset family as a starting point, but individual photographs may still require different exposure, white-balance, and tonal adjustments.
Final Thoughts
The right Portrait Lightroom Preset can make portrait editing more efficient by giving you a consistent starting point for color and tone.
But the most useful preset isn’t necessarily the one that produces the strongest transformation. For portrait photography, natural skin tones, controlled contrast, believable color, and easy fine-tuning are often more important than dramatic effects.
Among these four collections, 40 Portrait Lightroom Presets is the strongest option if variety is your priority. 10 Street Portrait Lightroom Presets makes more sense for urban and candid work, while 10 Shiny Portrait Lightroom Presets is better suited to bright and warm portrait styles. Romantic Portrait Lightroom Presets is the most specialized choice for soft, warm, intimate photography.
Whichever collection you choose, treat the preset as a starting point. Fine-tuning exposure, white balance, skin tones, and local adjustments is what turns a preset into a finished portrait.
Browse all portrait preset collections: → All Portrait Lightroom Presets
→ Common Lightroom Mistakes Beginners Make → Best Lightroom Settings for Golden Hour & Low Light
This post may contain affiliate links. If you make a purchase through one of these links, we may earn a small commission at no extra cost to you. See our [Affiliate Disclosure] for details.